

Dug North's Modified Leatherman Surge Used on Alone, Season 12 in South Africa
Custom modified Leatherman Surge used by Dug North on Season 12 of the History Channel show, ALONE

Dug North’s heavily modified Leatherman used on the ALONE television show
One Multi-tool to Rule Them All?
Forget everything you thought you knew about multi-tools. I modified a Leatherman Surge multi-tool to bring with me on Season 12 of the History Channel show ALONE which took place in the Great Karoo Desert of South Africa. I will be so bold as to say that this is the most heavily customized multitool ever to appear on the ALONE show. Prepare to be amazed by the versatility of my trusty customized survival companion.
The Value of the Multitool on ALONE
Over the course of 12 seasons, the value of a multitool on the show ALONE has become undeniable. In addition to performing a multitude of everyday tasks, we have seen Jordan Jonas process an entire moose with one. Clay Hayes carved a full size fishing rod with his. And Zach Fowler made a motarized floating mechanical trap called the “Duck Hunter 3000”!
Overview of the Leatherman Surge
The Leatherman Surge is an attractive model to bring on ALONE for several reasons. First, it is a large, robust tool. Second, four of the larger tools can be accessed without opening the pliers. Some of these tools — such as the large knife blades — can be opened with one hand. Finally, the tool is assembled with security Torx screws. With the right wrenches, the Surge can be taken apart and modified. I think it is safe to assume this will void the warranty, but I consider this to be a worthwhile tradeoff.
The Leatherman Surge is an outstanding tool right out of the box. Let’s take a look at its default configuration (see image below). From there, we’ll look at the changes I made to better suit my needs in African desert.
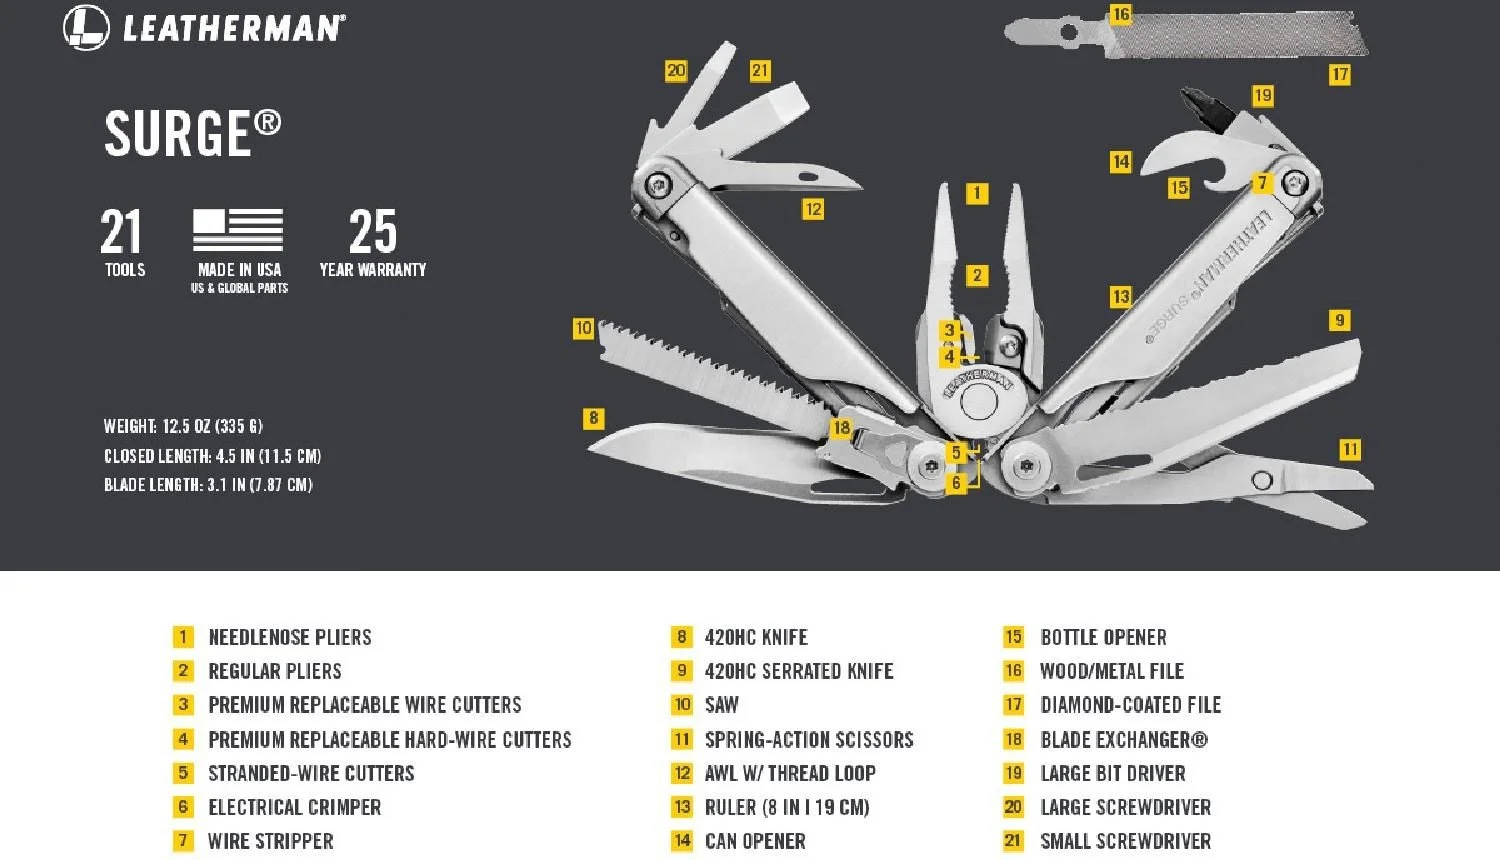
The full feature set on an unmodified Leatherman Surge Multi Tool
A very capable tool, the Surge is designed mostly for urban/mechanical tasks. My time in the African desert wasn’t going to involve a lot of Phillips head screws, bottle caps, or unopened metal cans. My goal was to increase its utility for working wood and shaping raw pieces of metal.
A Word About the Rules Regarding the Multi-tool on ALONE
As with all of the items that participants may bring on ALONE, strict rules apply to the Multi-tool. Here are a few points worth noting.
While many contestants choose the Leatherman brand, it is not only option. For example, Zach Fowler of Season 3 brought a multi-tool made by Victorinox.
Participants are allowed to bring a sheath dedicated to the multitool, be it canvas or leather. It cannot have built-in accessories.
Modifications to the multitool are allowed, but all of them must be approved by production.
If the model accepts removable bits or blades, the participant must make a single selection to use in those spots. No additional separate bits or blades can be brought into the field.
The Unmodified Surge Compared to Dug’s Customized Surge
The image below shows a “before” and “after” view of the Surge multi-tool. Let’s go through each major section of the tool and what I changed.

Left - an unmodified Leatherman Surge with the wood saw installed in the interchangeable slot. Right - Dug North’s heavily customized Leatherman Surge with an auger bit in the interchangeable slot.
Pliers
Pliers remained unchanged. I did install a fresh set of cutting jaws so they were completely unworn going into my African adventure.
The Four Large Tools
The four largest tools can be accessed on the outside of the handles without opening the pliers.
Main blade - I did not modify this tool. I did have an aftermarket blade made of a super steel, but I didn’t dare bring it to Africa untested! I still have yet to install it.
Wood saw - Inspired by the Leatherman used by Woniya Thibeault of ALONE, Season 6 and ALONE Frozen, this saw blade came from of a Leatherman MUT model. The saw blade replaced the large serrated blade found on the original tool. The blade does require some modification to the base of the blade to work with the liner lock mechanism. This was a fiddly process!
Single-cut mill file - I modified a 8” Nicholson file to fit in the spot occupied by the large scissors. This may strike many of you as a strange thing to prioritize for use in the wild, but the sad fact is that the world is covered in trash, much of it metal. With a good file and a hack saw, random bits of metal can be transformed into useful new tools.
Auger bit - I modified a self-feeding 5/8” flat auger bit to fit into the T-shank jigsaw blade holder. The drill bit isn’t used while in the Leatherman. Rather, the bit is removed and installed into a wood handle to a make an old-school brace and bit.
Right Handle Tools
Gouge - Also inspired by Woniya’s multitool, this small wood gouge was made from the large flathead screwdriver — a much more useful tool in the bush. This is great for carving spoons, bowls, and other concave surfaces.
Pen knife - Using an additional large flathead screwdriver blade, I ground out a small pen knife blade. This provided a backup knife that was much better suited for detail carving. If some unexpected disaster happened to the large knife blade, I would still have this tough little blade as a backup.
Scissors - With the large scissors removed to make way for the file, I found a way to reincorporate this valuable tool back into the Leatherman. I simply purchased a set of the scissors designed for the handle of the Leatherman Wave. They fit and work without any special modifications. For me, only the large knife blade gets more use than the scissors.
Left Handle Tools
Reamer - What Leatherman refers to as an “awl”, this tool was also unmodified, though I did sharpen the single bevel.
Chisel - Again, from Woniya’s multitool, this small straight chisel was made from another large flathead screwdriver blade.
Awl - The final tool inspired by Woniya’s multitool, this short, sharp all-purpose spike was shaped from the small flathead screwdriver found on the original Surge. This is great for punching holes, undoing knots, and pulling stitches without cutting the thread.
Hack saw - I found that I was just barely able to sneak a section of hacksaw blade into the handle with the other tools. I suspect, that I removed most of the washers bewtween the other tools to provide the needed space.
Add-ons
Rubber scales - I made high-visibility rubber scales for the handles using thin sheets of copper and several coats of orange Plasti-Dip. These were then epoxied to the tool. These are remarkably helpful — especially when working in a wet environment.
Lanyard picks - The original lanyard hidden in the tool’s handle can be replaced. I bought two titanium pick tools and modified one to quickly convert into a sewing needle if necessary,
Slotted screws - Not truly an add-on, but a modification for maintenance. I cut slots in each of the security nuts holding the tool together. This allowed me to use one of the titanium pick tools to tighten or loosen the screws, so I could maintain the Leatherman in the field. Of course, to get the tool apart without this modification, you’ll need a pair of T10 Security Torx Wrenches.
Effort and cost
For those inclined to make a tool exactly like mine, I want to let you know that it wasn’t exactly a quick, easy, or inexpensive project. For me, it was worth it, however. In addition to many hours of manual labor, my costs were as follows:
Leatherman Surge $150
Mut saw blade $30
Large screwdriver blades x 2 $48
Titanium awl set $30
Wave scissors $25
Nicholson mill file $9
Hack saw blade $5
Plasti-dip $20
Securty Torx wrenches $6
TOTAL $323
A few tips on making these modifications
Use the base of spare OEM blades (e.g. the serrated knife blade) as a pattern for shaping custom tools
A Dremel tool with grinding bits is very helpful for shaping tools
Work slowly and carefully. Small changes have a huge impact on how well a tool performs and locks.
Look for parts on eBay. Keep in mind that it is sometimes it is less expensive to buy an entire used tool rather than buying a single part. A damaged tool with some good parts on it can be an economical source for parts.
As time goes on more and more specialized tools are being designed for the interchangeable blade slot. Be sure to do a search for that special tool you need before making one from scratch!
Starting a fire with sticks: start-to-finish bow drill friction fire
I recently demonstrated how to make a bow drill friction fire. This video shows the technique from start to finish with my explanation of the process. The parts of the set include the spindle, hearth board, bearing block, bow, ember catch, and tinder bundle. For this example, the spindle and hearth were made of basswood. The bow is made of oak and paracord. The ember catch is a small, thick piece of birch bark. The tinder bundle is largely grass with some goldenrod flowers and cedar bark.
If you found this video helpful please sign up for the email newsletter below!
Wilderness Survival Training: Practicing Resourcefulness

Pause to calm down and organize your thoughts. This will be time well spent.
You are your greatest resource in a survival situation
When traveling into the backcountry we should all be as prepared as possible. This includes carrying a decent survival kit. At a minimum this should include more than one way to start a fire, a means for purifying and holding water, and some form of protective cover such as a trash bag, emergency wrap, or bivvy bag.
What if you don’t have these things or if you need something beyond what you thought to bring? This is where thinking creatively can serve you well, perhaps even save your life.
Establish survival priorities
In all likelihood, you will be concerned with more than one thing. Do you need to make a shelter, find water, or signal for help? You can only do one thing at a time and chances are good that one thing is more important than the others.
Take a few minutes to breathe deeply and calm yourself. This will go a long way toward using your resources effectively. Decide what your most important action will be, then focus your efforts on that thing.
Next, consider that the nature of the questions you ask yourself will have a huge impact on the number and quality of solutions that present themselves. Ask yourself questions — out loud, if necessary — to generate ideas. Don’t judge these ideas harshly. Try to come up with as many ideas as you can that address the priority you have set.
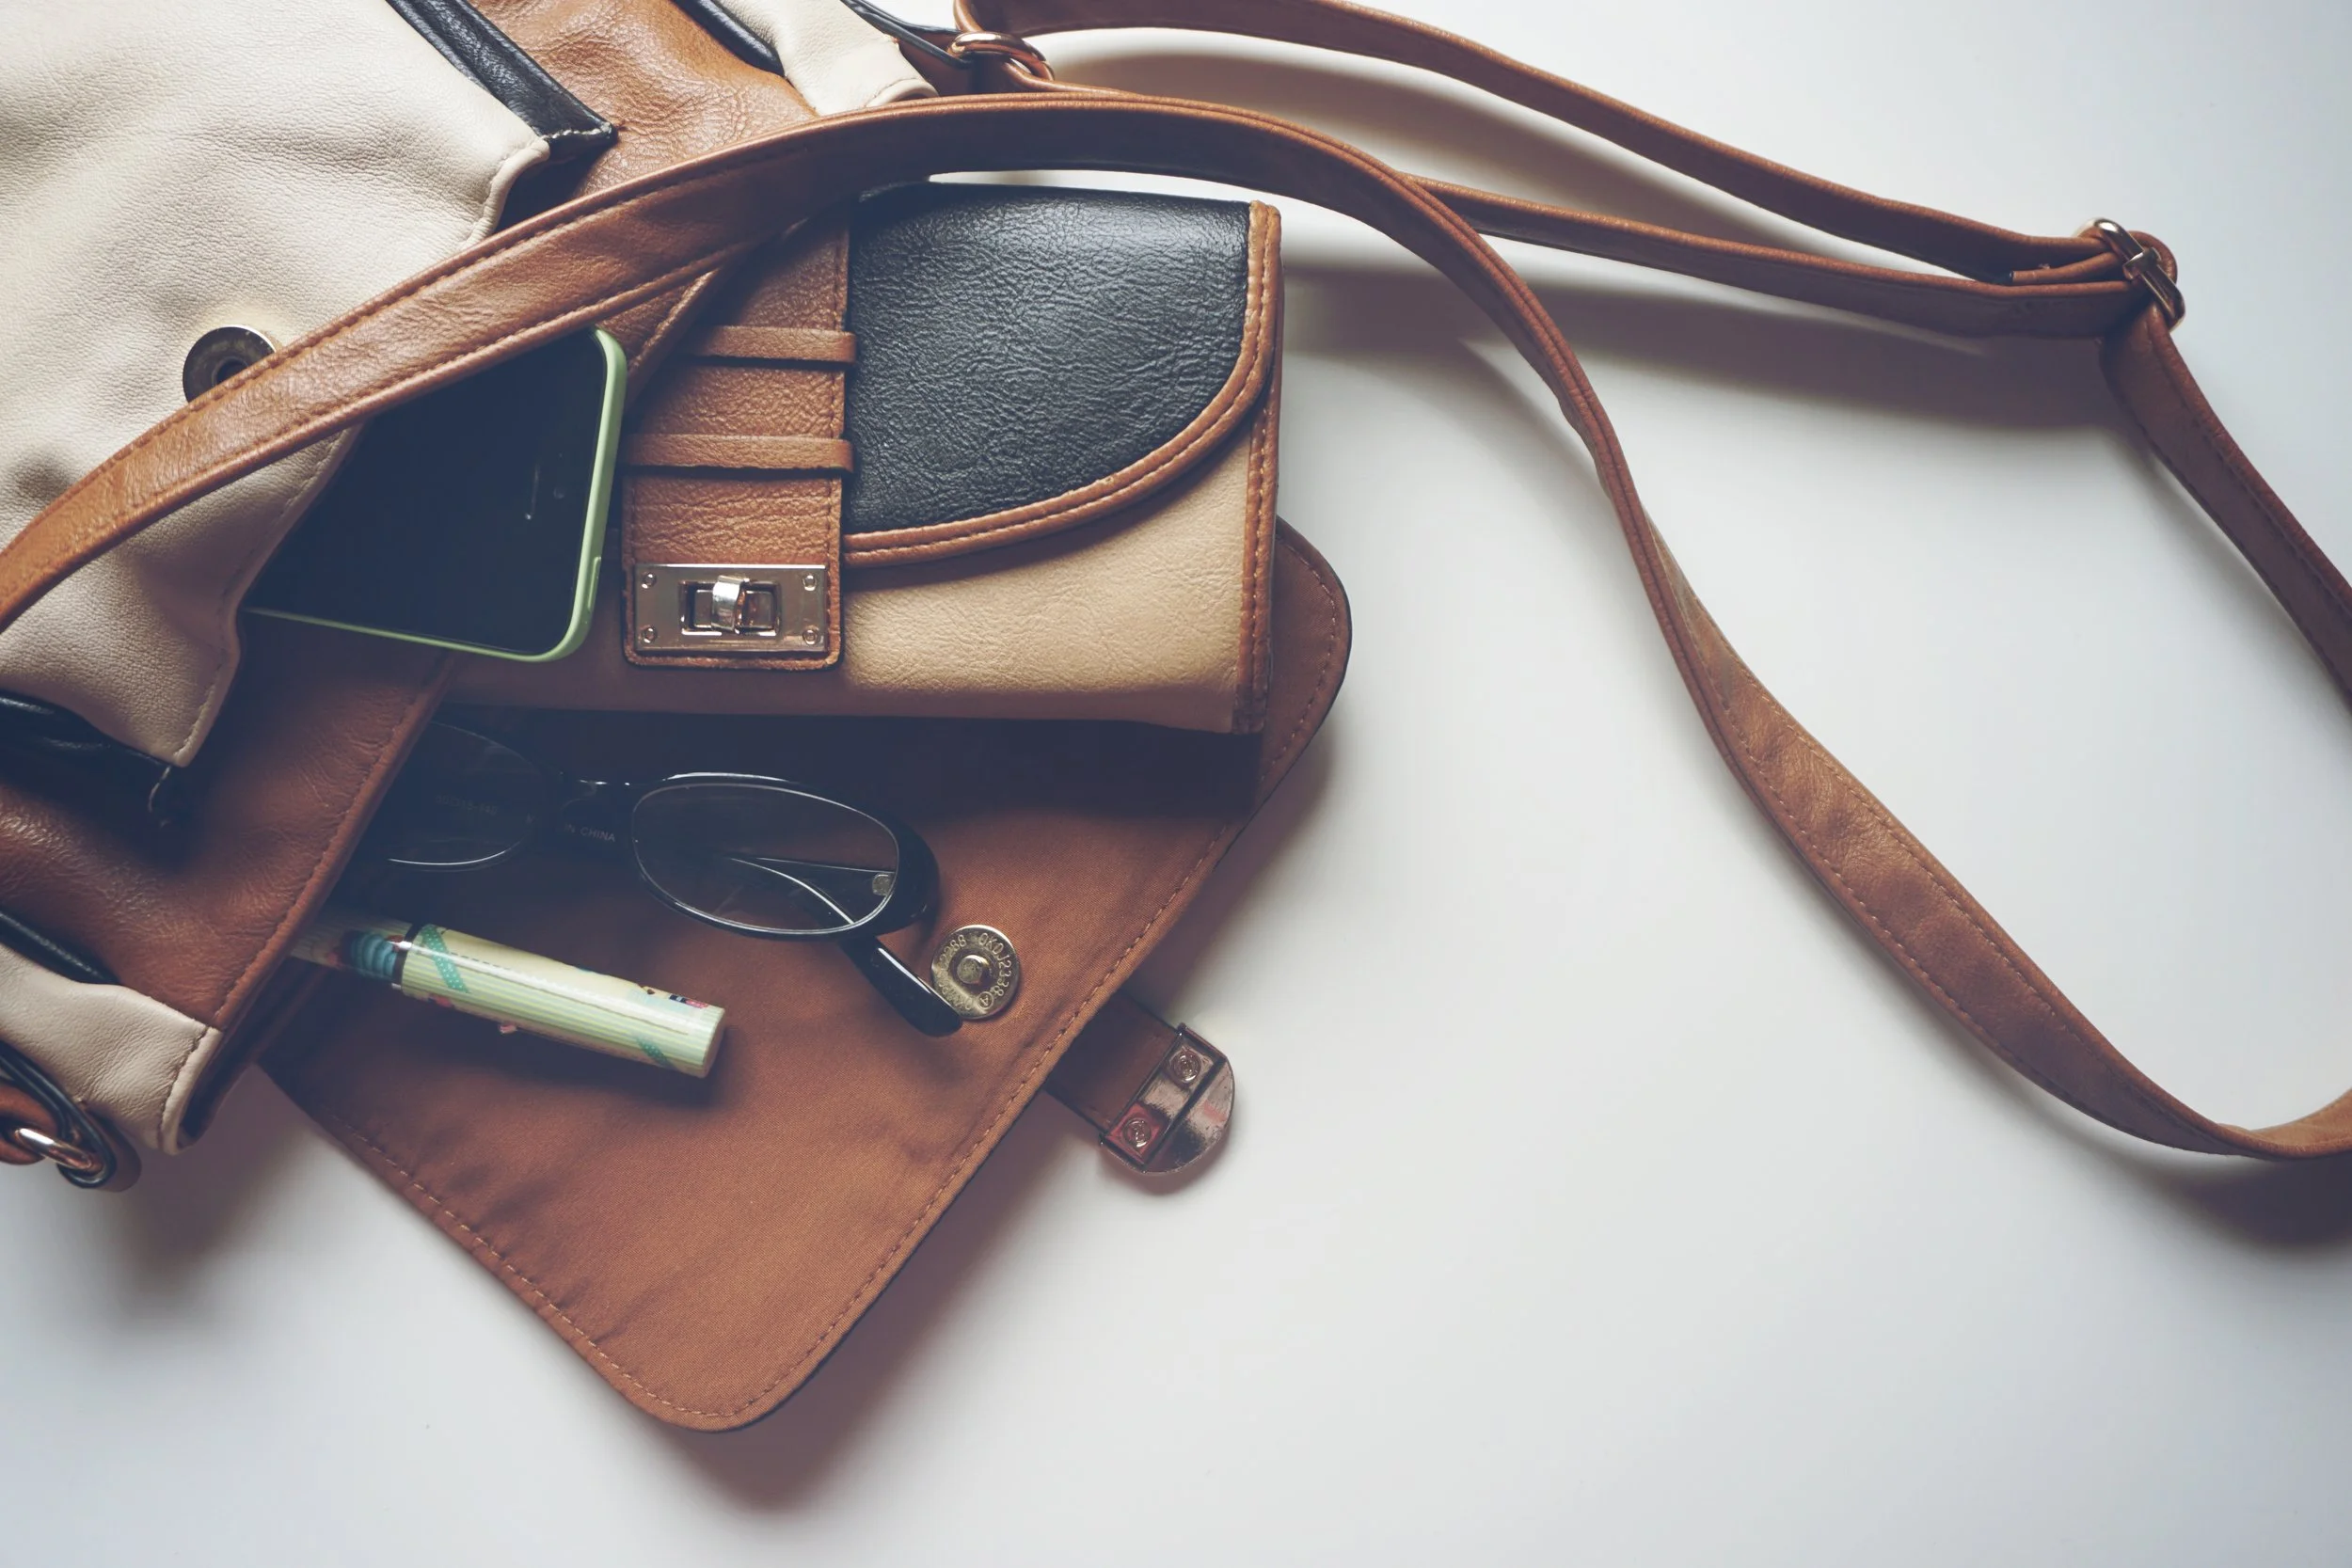
Take inventory what you have and consider all of the ways it might be used
What do you need to do to survive?
Let’s say you have determined that you need to start a fire. Certain options will surely come to mind first: lighter, matches, or a ferro rod. These are good options, but there are many more ways to start a fire.
If you don’t have the most obvious means for starting a fire make a list of all of the methods you know of. This could jog your memory and open up additional viable options. Perhaps you’ve made a bow drill fire before? If so, you have an additional avenue to explore.
What do you have on you to help you survive?
Creating a bow drill fire requires some type of rope or cord. Others things will work, however. Take an inventory of what is in your survival kit, car, pack, your pockets, purse, wallet, and your clothes themselves, looking for options. For a bow drill cord I have used a belt, a bandana, clothing, cattail cordage, cedar roots, a rifle sling, and a plastic grocery bag. There are plenty of other things that would work as well.

What resources might you be able to scavenge from the things around you?
Pro tip: Play with alternative uses for things when you aren’t in an emergency situation. This can be a fun exercise. A car key can be used as a crude saw, chapstick can lubricate a bearing block, and a purse strap might work as a bow drill cord. Get good at using alternate types of gear.
What can you find to survive?
Sadly, human garbage is almost everywhere. Many human-made materials have properties that are difficult to find in nature. Search the area for signs of human activity: old foundations, fence lines, roadsides, logged areas, junked cards, and anywhere that humans might have been. You may find something.
Depending on your needs, even a small piece of something might make a huge difference. Finding a few feet of sturdy cordage suddenly makes a bow drill fire much more feasible.
Pro tip: In addition to practicing well-known survival techniques, look into survival hacks that make creative use of the items around you to survive.

Consider not only the object, but also its parts and contents. You need to weigh the value of the intact object against the value it might provide if compromised.
How can you use an item or its parts?
The best use of the things you have at hand, may require you to ruin those objects. Perhaps you need to break your eyeglasses to put the lenses together back-to-back to focus the sunlight for a solar ignition. Perhaps there is a battery inside an electronic device that could be used to make a spark. You need to weigh the value of the intact object against the value it might provide if compromised. Remember, most things can be replaced.
I have torn the hem off of my t-shirt, soaked it in water, and twisted it to create a strong cord for a bow drill fire. Yes, that t-shirt was ruined, but in a bad situation, this would be a worthwhile sacrifice.
What can you do instead?
Don’t be too set in your ways. Keep your eyes and your mind open to things that might work. Don’t be too quick to abandon ideas.
As an example, I was once using a bow drill set with a pine spindle and hearth. I had a hard piece of oak for the bearing-block. As I struggled to get an ember, I noticed that the oak bearing-block was smoking more than the hearth. While I couldn’t account for this unusual phenomenon, I could exploit it. I flipped the whole set over, using the bearing-block as the hearth and the hearth as the bearing block. I was able to get a glowing ember using the new configuration.
You have more resources to survive than you realize
We all tend to see and use things in limited ways. Looking beyond those limits could save your life in a wilderness survival situation. I hope this article has helped you see that you probably have more resources — both mental and physical — than you realize.
Until next time, keep learning!
-Dug North
EXERCISE: Practicing resourcefulness with the bow drill friction fire
Here’s a video of me practicing resourcefulness. I create a glowing bow drill ember with some items that you don’t normally use for a friction fire. Please note: this is NOT a survival technique! I am definitely not proposing that you carry a coat hanger, beer bottle, and plastic bag into the woods with you. Rather, this is an example of using resources in unconventional ways.
Resources
Surviving the Wild by Joshua Enyart
Survival Hacks: Over 200 Ways to Use Everyday Items for Wilderness Survival by Creek Stewart
Creative Thinking: A Field Guide to Building Your Strategic Core by Angus Fletcher
The Bow Drill Bible by Leigh Robinson
Make the ultimate ferrocerium rod with a fatwood handle

An extra large ferrocerium rod with a custom fatwood handle
Why use an extra large ferro rod?
In preparation for an upcoming winter outing, I purchased an extra-large ferrocerium rod. My main ferro rod to date has been a 3/8” diameter rod that is 6 inches long. It has served me well. If the smaller rod works, why did I just buy such a large new one?
The need for a large ferro rod basically comes down to the desire to maximize my chance of success when starting a fire. More sparks from the ferro rod improve the chances of successfully igniting the tinder. The amount of sparks produced is largely a function of how much of the pyrophoric material is scraped from the ferro rod. This, in turn, is largely a function of how much of the rod’s surface is effectively scraped.
Compared to my old 6” rod, the new 8” rod increase the surface area of the ferro rod that is scraped by 33%. That’s a significant increase. What’s more, over time the diameter of the rod can contribute to an increase in surface area as well, if the rod is consistently used on one spot, thus creating a flat surface.
A fatwood handle for the ferro rod
I had an idea to add a fatwood handle to the new extra-long ferro rod. This would serve two purposes. First, the handle will help to keep my fingers out of the way so I can use more of the rod's length for creating sparks. Second, in the absence of suitable tinder in the environment, I can scrape fatwood shavings off the handle itself.

Schematic drawing showing how to add a wood handle to a large ferrocerium rod
What is fatwood and why is so great? First of all, fatwood doesn’t describe a particular species of tree. Rather, it is a general term that describes dried wood that has been naturally impregnated with flammable resin. Many resinous trees — mostly conifers — are capable of producing fatwood.
The resins in fatwood make it very flammable. Fine fatwood shavings scraped from a larger piece will readily accept the sparks from a ferro rod. They will even light when wet. Once lit, fatwood produces a strong flame that is able to resist gusts of wind and is capable of igniting larger pieces of fuelwood. Finally, fatwood is a material durable enough to serve as a sturdy handle.
Making and mounting a wood handle to the ferro rod
Mounting the fatwood to the ferrocerium rod was pretty straightforward. First, I used wood glue to bond two pieces of fatwood together to make a single piece thick enough to serve as the handle. Next, I used a drill press to drill a 1/2" diameter hole into one end of the fatwood. This is the same size as the diameter of the ferro rod. The ferro rod came with a small lanyard hole in one end. I measured where this hole would be located with the rod inserted into the fatwood, then drilled a small hole through the sides of the wood. I used a hammer to tap a piece of brass rod through both the handle and ferro rod. After trimming the rod flush with the sides of the handle, I peened (hammered) the ends of the brass rod to prevent it from sliding out. Alternatively, you could use a few drops of Super Glue to keep the pin from sliding out.

A modified leather knife sheath for carrying an extra large ferro rod on a belt
Creating a custom leather sheath for the ferro rod
This is a pretty large ferro rod, so I reasoned that it needed its own sheath. I had recently replaced an old leather knife sheath because the bottom seam had started to come apart. I cut the lower end completely off the sheath so the rod could poke through the bottom. Next, I soaked the old sheath in water for about 20 minutes, then fit the rod inside. I manipulated the wet leather to take the shape of the rod and handle. To ensure that the rod would never fall through the sheath, I added two metal rivets to the bottom of the sheath. Finally, I added a leather strap with a snap to keep the rod from ever falling out the top.
Using fatwood to create tinder
The process for using the fatwood handle to create tinder is the same method one would use for any piece of fatwood. The wood is scraped to produce fine shavings. This is often accomplished with the spine of a knife that has been ground to have a sharp 90-degree edge. Invert the rod such that you are using the rod as the handle and brace the fatwood on a stump or other suitable surface. Use the spine of a knife to scrape up and down on one of the exposed corners of the fatwood. Ideally, a golf ball-sized bundle would be made. I may use smaller bundles to extend the life of my handle. However, I don’t have to be conservative. Because glue wasn't used, I can replace the fatwood handle down the road if I wear it down from use.
RESOURCES
Kräftig 8″ Ferro Rod - this is where I got the one shown in this article
Leather Knife Sheath - this is the model of sheath I modified to hold the ferro rod in this article
* Some of the links on this page go to Amazon and some go to the website of my friend, Josh Enyart, The Gray Bearded Green Beret. I make a small commission on these referrals. I appreciate your support!

How to make a friction fire with bamboo - Fire SAw Method
The bamboo fire saw is a fascinating friction fire technique requiring only a dry piece of bamboo and a knife.
The bamboo fire saw is one of my favorite friction fire techniques. There is something magical about the fact that the process requires only a piece of bamboo and a knife. This method closely matches the popular notion about friction fire as “rubbing two sticks together”.
What do you need for the bamboo fire saw method?
To create a bamboo fire saw set you will need only a few things:
A sturdy fixed blade knife
A length of dry bamboo pole at least 1-1/2 inches in diameter and 24 inches long. A 2 or 3 inch diameter pole would be even better. I used the bottom of a citronella bug repellant torch
A place outdoors with soft ground and/or a large tree
Why use bamboo to start a friction fire?
Bamboo is a remarkable material. First, it is very strong and hard. This allows us to apply a lot of force without breaking the bamboo. Second, the ignition temperature of 265 degrees is fairly low. This makes it suitable for friction fire techniques.
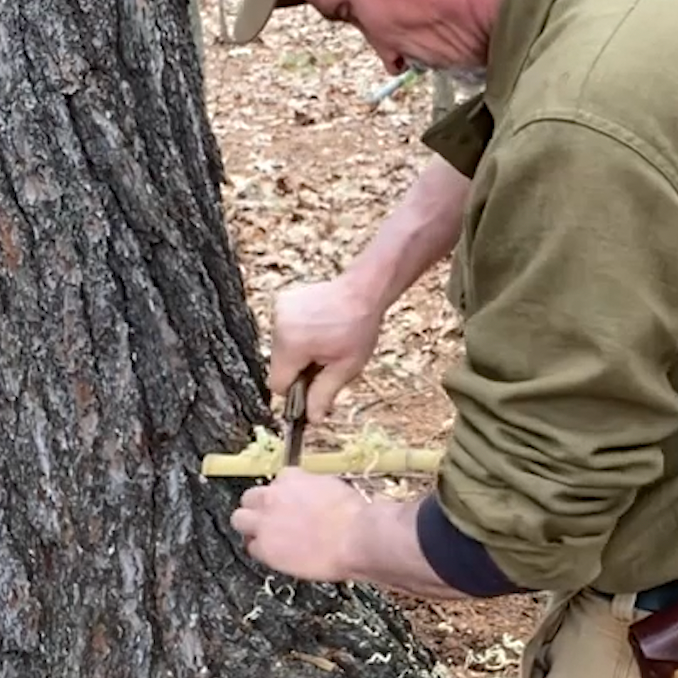
Scrape off a bunch of tinder shavings from the outside of the bamboo
As with any friction fire, we will need to have a tinder bundle prepared for the glowing ember created by the process. Use the blade of a knife to scrape the outside of bamboo to produce thin, curly shavings. You will need to make one large bundle about the size of a baseball. You will also need two smaller bundles, each about the size of a golf ball.
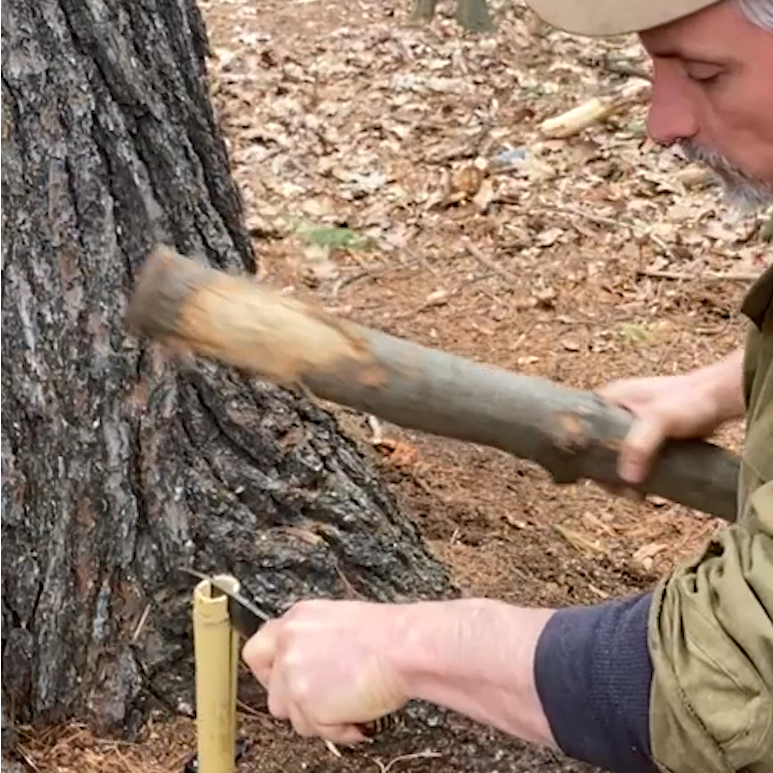
Split the bamboo lengthwise
You will need two long pieces of bamboo. These are made by splitting the bamboo stick two down its length. Use a fixed blade knife and a hefty chunk of wood to baton the from one end. Bamboo splits easily, so once you get it started, you may be able to pull the two pieces apart. It’s best if the two pieces are close to the same size.
Prepare the bamboo hearth board
Choose the larger of your two bamboo pieces and designate this as the hearth board. In use, this will be oriented with the concave side down, leaving the two outer edges point up. Choose one of these edges and shave it down to make a long section that is about as has thin as a butter knife. This will be the edge upon which you saw.

Fashion the bamboo saw
Use the other piece of bamboo to make the saw. Locate the middle of the piece and begin to drill a hole with the tip of your knife from the inside out. Stop drilling when the tip of the knife just barely begins to show on the outside surface of the bamboo. Next, locate the point on the outside where the knife started to come through. Use a knife to make a small groove directly above the hole. This groove should run perpendicular to the length of the piece of bamboo. Bamboo is quite hard, so a triangular metal file can also be used to create this groove.
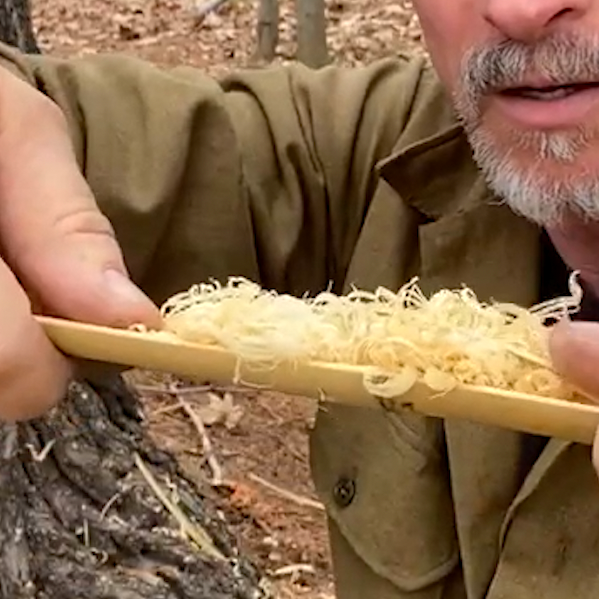
With the carving complete, place the two golf ball sized tinder bundles into the concavity of the saw. These are placed on either side of the drilled hole. Use your thumbs or a long strip of bamboo to hold the bundles in place. These bundles will catch and hold the hot dust formed when you begin sawing.
Create an ember with the bamboo fire saw
First, place one end of the hearth on or near your belt buckle and the other end against a tree or in the ground. In either case, you must secure the hearth firmly by using your body weight to hold it in place. You will need both hands to operate the saw.

Place the small groove you carved in the saw on the thinned edge of the hearth piece. Using both hands, press the saw downward as you move it back and forth along the hearth. With moderately vigorous action, you should start to smell a somewhat sweet burning smell. Keep sawing. Watch the top edge of the hearth. It should start to turn brown. At this point you may also see a small wisp of smoke. Again, keep sawing.
Next, focus on the spot on the hearth that seems to be the darkest brown and concentrate the sawing motion over this spot. Increase both speed and downward pressure. There should be quite a bit of smoke now. The sawing action over the dark area on the hearth is creates hot dust that gets pushed up into the hole in the saw. The small tinder bundles keep this dust from dispersing.

Now it is time to make the final push. Saw as vigorously as you can, while remaining in control. Keep it up for as long as you can — which won’t be very long. When you’ve stopped, turn the saw over and tap the saw near the groove to help dislodge any ember that might be there. Carefully lift the saw from the two small tinder bundles. If things have gone well, you should see a dark pile of dust on top of the bundles that is smoking on its own. Congratulations, you have made an ember!

Bring the ember in the tinder bundle to flame
Bringing the ember to flame is like any other friction fire method. Carefully place the small smoking ember in the middle of the baseball size tinder bundle. Gently close some of the tinder around the sides of the ember, being careful not to crush or smother it. Now hold the bundle up to allow the heat from the ember to reach more fuel above it. Finally, blow softly and steadily on the ember. As the smoke increases and grows thicker, you can blow harder. After a bit of blowing, the bundle should burst into flame. Of course, you can also drop the ember into any natural tinder source to create flame. Fatwood shavings are a particular favorite of mine.
Resources
* Some of the links on this page go to Amazon and some go to the website of my friend, Josh Enyart, The Gray Bearded Green Beret. I make a small commission on these referrals. I appreciate your support!
Troubleshooting campfire Problems Using the Fire Triangle

Sometimes a match alone won’t start a fire
In Part 1 of this series, we learned about the fire triangle and how heat, oxygen, and fuel are all needed for a fire. Next, let’s take a look at how we can use this knowledge to troubleshoot problems we might encounter when starting an outdoor fire. So, how do you start a campfire and keep a fire going?
Fire problems Associated with Heat
Problems with heat almost always have to do with not having enough of it. This prevents the pyrolysis process from happening. Without those gasses, there is nothing to react with oxygen, and thus prevents combustion.
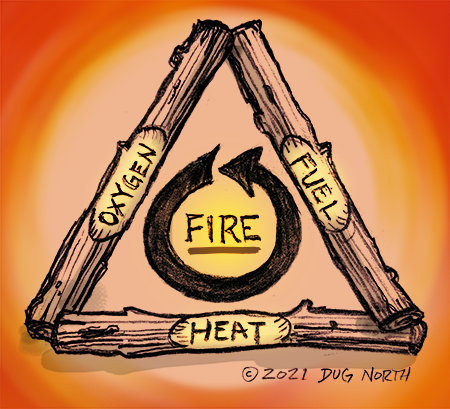
The fire triangle: heat fuel and oxygen
Fire built on damp ground
A tinder bundle that is lit on damp ground -- or worse, on snow and ice -- will lose much of its heat in attempting to warm and dry the surface below. This may prevent adequate heat from getting to the next largest size of tinder or fuel
Solution: move the fire to a drier location.
Solution 2: build your initial fire on top of some aluminum foil which creates a barrier between the fire and the wet ground.
Solution 3: build up a structure of sticks or tree bark to get the fire off the ground. Dry materials are best.

Sparks can sometimes be too brief
Sparks from ferro rod are too brief
The spark scraped from a ferrocerium rod may be too brief to warm up and ignite your tinder.
Solution: If using a ferrocerium rod, try incorporating some flash tinder. Flash tinders are extremely fine tinders that accept the smallest spark and then burn very hot and fast. This can help spread the initial flame to more of your tinder bundle. Common flash tinders include such as cattail fluff, milkweed fluff, and magnesium shavings.
Pro tip: the ferro rod itself can be used as a type of flash tinder. Slowly and carefully scrape unburned shavings from the rod into your tinder bundle. This requires some patience and care. These ferro rod shavings will ignite within the bundle when you later use the ferro rod to shower the tinder bundle with sparks.

A regular match may not provide enough heat
Flame is too brief
The flame from a match may not last long enough to light small kindling directly.
Solution 1: use finer tinder to allow the match flame to catch hold.
Solution 2: use a bigger match! There are several brands of large matches that burn longer and hotter. Consider the UCO Titan Stormproof Matches, which burn for 25 seconds.
Solution 3: use a flame extender. The flame from a match can be transferred to a small candle, a long sliver of fatwood, or strips of birch bark. This will give you a longer flame that can help you light less-than-perfect tinder.
Pro tip: some conifer tree resins are very flammable. A glob of pine pitch on the end of a stick can make a great flame extender.
Fire problems associated with Oxygen
Problems with oxygen most often take to form of an inadequate access
The Fuel is Limiting Airflow
It can be tempting to put a lot of fuel on a small fire but this can be a problem if it prevents enough air from reaching the system. A fire that isn’t getting enough oxygen will have diminishing flames and often a lot of smoke.
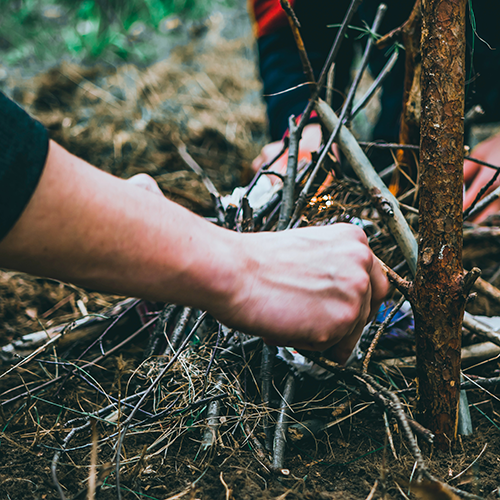
A fire needs good access to oxygen in the air
Solution 1 : Blowing and fanning a fire are well known solutions, but somewhat labor-intensive. Blowing can be made much easier and more efficient by using a small tube such as a pocket bellows directed at the base of the fire.
Solution 2: Consider learning to build a fire lay. A fire lay is an arrangement of fuel into a structure that helps to ensure that adequate air can reach the fire. Common fire lays included the tipi and the log cabin.
Solution 3: If there is a prevailing wind, create a gap in the fuel out on that side of the fire. This creates an opening into which the wind can enter, effectively blowing on the fire for you.
Solution 4: Finally, recall that hot air rises. This means you can dig a trench below the fire to provide air from underneath.
Pro tip: there is a fire lay designed to allow you to adjust the amount of oxygen available to a fire. My friend, The Gray Bearded Green Beret, has a great video demonstrating the elevator fire lay.
Fire problems Associated with Fuel
Damp Wood
The moisture in damp wood robs heat from the fire triangle. The heat energy is wasted in turning water into water vapor. This will delay or prevent the wood from reaching the point of pyrolysis.

A flame source with its own integrated tinder
Solution 1: Look for dry wood. The lower dead limbs of conifers are often dryer than what is on the ground. Look under logs, bark, or trees with a thick canopy. If you have a saw or axe, seek the inner portions of standing dead wood, which is often dryer.
Solution 2: Use a lot more tinder. A very large tinder bundle -- especially one made of birch bark or fatwood, which will burn when wet -- can dry out your kindling and get your fire going.
Solution 3: Use an accelerant to help things along. This could be a natural resource such as pine pitch or a commercial fire starting tinder which typically burn longer and hotter than most natural tinders.
Solution 4: use a flame source that integrates a long-burning tinder. Examples include UCO Sweetfire Fire Starters and UCO Sweetfire Behemoth Fire Starters, both of which burn for many minutes.
Pro tip: once you have a fire going, be sure to use it to dry out any damp or wet firewood.
Fuel Added Too Quickly
Adding too much wood too quickly can stifle a fire that is still being built. This is a combination of problems: not enough air reaching the fire and not enough heat to ignite the excessive amount of fuel.
Solution: only add more fuel, when you see flames extending well above the fuel that is already in the fire.

A dense mix of kindling sizes often works best
The Wood Pieces are Too Large
If the wood is very large, it will be able to absorb a great deal of heat before it breaks down and starts to volitilize gas. This problem may show up as a weak or diminishing flame with the kindling or firewood failing to ignite.
Solution 1: make sure you have a range of kindling sizes mixed together. This mix should include matchstick, pencil, and then magic marker size pieces.
Solution 2: use and axe or knife and baton to split the wood. Dividing in this way the fuel reduces the mass of each piece while also increasing its surface area relative to its volume. This will help any applied heat to start the pyrolysis process.
Fuel is Too Spread Out
It’s a very common mistake to have the tinder or kindling arranged loosely and too spread out. The problem here is that one burning piece of wood isn’t able to effectively heat any adjacent pieces. Said another way, each individual piece of kindling may burn in isolation, failing to support the larger chain reaction of combustion.
Solution: Bringing the pieces of fuel closer together. This allows all of the burning pieces to heat each other, reinforcing the combustion chain reaction.
Fuel Located in the Wrong Spot
Both heat and flames rise. Fuel placed too far to the side of a tinder bundle is unlikely to receive enough heat to ignite.
Solution: place your smallest and most dry tinder directly above your tinder bundle. This may require making some quick adjustments on-the-fly so be ready to act once the tinder bundle is lit.
Resources
UCO Sweetfire Fire Starters
UCO Sweetfire Behemoth Fire Starters
Fatwood
* Some of the links on this page go to Amazon and some go to the website of my friend, Josh Enyart, The Gray Bearded Green Beret. I make a small commission on these referrals, and I appreciate your support!
Understanding the Fire Triangle and learning to use it when starting a fire
Understanding the Fire Triangle
Whether it is for camping, bushcraft practice, a survival situation, or just backyard socializing, lighting a fire can be difficult. As simple as fire starting may appear to be, there are many variables at play. With a better understanding of these variables, the process of starting a fire becomes less mysterious. One model that’s often used to understand the process is called the fire triangle.
This is the first in a two part article on the fire triangle and how we can use it to better understand what is happening when we attempt to light an open fire.
What is the Fire Triangle?
The fire triangle is a model used to represent the three main components that must be present to make and sustain a fire. These elements are heat, oxygen, and fuel. Why a triangle? There’s no real reason other than the fact that there are three elements and that can be represented graphically with a three-sided shape -- the triangle.
Heat: Spark, Ember, and Flame
Let’s say you have some dry wood sitting on the ground and exposed to the air. Why doesn’t it burst into flames spontaneously? The reason is we still need the third side of the fire triangle, heat, to jump-start the process we call fire.
Heat can be introduced into the triangle in a number of ways. It may be the ember from a bow drill, the spark from a ferrocerium rod, light from a magnifying glass, or the flame from a lighter or match.
Oxygen: The Gas Needed for Combustion
The next part of the triangle is oxygen. The air around us is made up of about 21% oxygen -- exactly what we need to create fire. At times we may encourage more air to enter the system by blowing on the fire, fanning it, or creating physical structures that promote air flow.
Technically, there are other gasses that can be used to sustain fire, but in the context of an outdoor fire, we can ignore these for the most part.
Fuel: Tinder, Kindling, and Firewood
The final element in the fire triangle is fuel. For an outdoor fire, this means tinder, kindling, and firewood.
Our initial fuel is known as tinder. Tinder is a fine, often fluffy material capable of taking a small amount of heat and turning it into flame. Some tinder materials contain flammable compounds while others have very small fibers that are easy to heat up. Tinders may be natural or some form of human-made tinder.
After the tinder, we make use of kindling — matchstick to marker sized sticks — and then work our way up to pieces that are larger still: firewood.
The Chain Reaction of Combustion
When heat is applied externally to a fuel such as wood, the cellulose in the wood begins to undergo a type of thermal decomposition called pyrolysis. As the chemical structure of the wood decomposes, certain gasses are released or volatilized.
These gasses react vigorously with the oxygen in the air in a process called combustion. This is another way of saying that we have lit the fuel on fire.
Combustion is an exothermic reaction, which means it gives off heat. Because it does so, it reinforces the continuation of the process. Provided that adequate fuel and oxygen continue to be provided, we have started a chain reaction.
The cycle repeats: preheating of the fuel, gasses being released, and those gasses reacting with oxygen. If everything goes according to plan, the chain reaction continues with larger and larger pieces of fuel putting off more and more heat. Eventually, we have a fire large enough to heat up and ignite fairly large pieces of wood.
With a hot bed of coals established, we can add fuel of almost any size. Why? Because the coals are putting off a tremendous amount of heat and will be capable of starting the process of pyrolysis, which sets the stage for more combustion.
How to Make use of The Fire Triangle
In part 2 of this series, we’ll take a look at how the fire triangle can be used to troubleshoot problems we often encounter when lighting a fire outdoors.
Resources
| Spark Sources | Flame Sources | Other Sources |
|
|
|
|
| Natural Tinder | Human-made Tinder | Improvised Tinder |
|
|
|
|
* Some of the links on this page go to Amazon and some go to the website of my friend The Gray Bearded Green Beret. I make a small commission on all referrals.
12 Holiday Gifts for the Wilderness Adventurer
The holidays are here again, which means it’s time to ponder gifts. Here’s a list of gifts for the outdoor lovers in your life. I’ve tried to focus on gifts that are fairly small in size and around $50 or less. Some of the links below go to Amazon and some go to the website of my friend The Gray Bearded Green Beret. I make a small commission on all referrals. That said, these really are some of my absolute favorite products.
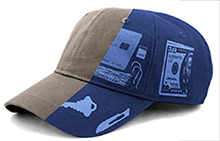
Wazoo Cache Cap
I love these baseball hats by Wazoo Survival Gear. Each hat has four cleverly designed hidden pockets for storing small items. I have stashed kevlar cord, water purification tablets, duct tape, and even a small knife in mine. They come in a variety of colors including gray, green, tan, and camouflage.
Pro tip: Get the most out of the hat with this bundle, which includes the Wazoo Cache Cap and a small ferro rod and striker combo designed to fit into small slots sewn into the edges of the bill. This version also has a velcro spot on the crown for a patch of your choice.

UCO Titan Stormproof Matches and Case
These jumbo 4-inch long matches are nothing like the flimsy “waterproof” matches I used as a kid. Each match will burn for over 20 seconds. The added time and heat can be crucial if you are working with tinder that is less than perfect. These things are so badass that they will relight after being submerged in water. It is true; I have seen it first hand.
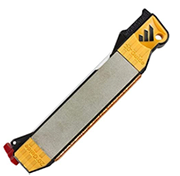
Work Sharp Guided Field Sharpener
This little knife sharpener is about the size of a harmonica. It features two diamond hones, an adjustable ceramic hone, and a leather strop. Best of all are the integrated angle guides. These little ramps make it much easier to keep the blade at a perfect 20 degree angle as you move it across the various hones. The addition of a leather strop is next level stuff. Once a proper angle has been put on a knife, we should all be stropping a lot more and honing a lot less!
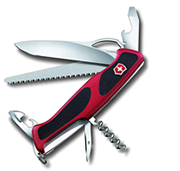
Victorinox RangerGrip 79 Swiss Army Pocket Knife
Victorinox still makes the best pocket knives in my book. This one puts the emphasis where it is needed: the knife and the saw. The blade on this can be opened with one hand and locks securely for safety. This model does NOT have a serrated blade. Serrations are a drawback for most cutting tasks. At a bit over 5 inches, this model is bigger than you might expect and this is helpful — especially when using the saw. The textured grip is another nice feature, as are the other foundational tools, which include a can opener, bottle opener/screwdriver, awl, and corkscrew. This knife gets top marks for utility and value.
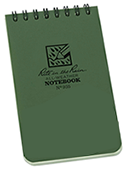
Rite in the Rain Weatherproof Notebook
A notebook might not sound a like a fun gift, but these are so practical and so functional it hardly matters. Outdoor people do stuff in the rain. It’s just how it is. If they happen to want to write anything down, plain old paper just doesn’t hold up. These notebooks do. I spent a long, wet day practicing land navigation in the rain. All of notes were taken on one of these notebooks and it worked beautifully.
Pro tip: I recommend that you get one of their thick lead mechanical pencils to make life even easier.

Tiny Survival Guide: A Life Insurance Policy in Your Pocket
This credit card size booklet unfolds like a map. While it’s no replacement for a full-size survival book, it does provide a lot of useful information. The guide includes dozens of tips with over 100 illustrations covering things like first aid, shelter, fire, water, navigation, signaling, knots, and specific environments. A little bit of guidance during a bad situation could be both helpful and comforting. If you are looking to take your gift to the next level, they also offer a bundle that comes with two booklets: Tiny Survival Guide and Tiny First Aid Guide.
Pro tip: Use the included plastic Fresnel lens to read the fine print in the booklet. It might also be used to start an emergency fire using sunlight.
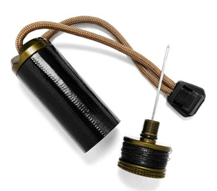
Exotac ripSPOOL Field Repair Kit
Exotac is one of those companies that really comes up with some innovative outdoor gear. The ripSPOOL is a perfect example of this, combining a heavy-duty sail needle, 30lb test synthetic braided line, and a roll of black repair tape. All of this comes in a compact, contained unit with a lanyard that itself is a specialty fire tinder.
Pro tip: Repair tape is flammable and makes a decent emergency tinder — especially when everything outside is wet.

Silky Gomboy Folding Saw
Silky makes a variety of multipurpose folding saws. Unlike western saws, these are based on a Japanese design that cuts on the pull stroke. This, along with some fancy hardened teeth, makes for a very smooth and very fast cutting action. Add to this a nicely textured, rubber-padded handle and you have one compact, but capable saw for the woodlands. They make a variety of sizes — and they are all good — but I find the Gomboy size to be the best balance between size and utility.

Wazoo The Bushcraft Fire Starter Necklace
Yup, there’s that Wazoo brand name again. What can I say? This company makes great stuff! This handsome little necklace holds a surprise: it can start a fire! Attached to the leather cord is a miniature ferrocerium rod and a ceramic striker. Simply scrape the rod with the striker to produce a shower of sparks. Works well with the Spartan Fire Tinder mentioned above.
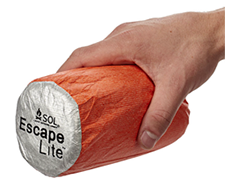
S.O.L. Emergency Escape Lite Bivvy
It’s common practice for people who spend time outdoors to carry a survival kit. One of the staple items in these kits is often the classic mylar space blanket. These have been improved in recent years by making them into a simple sleeping bag configuration. However, they have one major drawback: they do not allow moisture out. This means you can end up in an uncomfortably damp situation. The S.O.L. Escape Lite Bivvy provides the benefits of a space blanket — reflecting 70% of your body heat back — while allowing moisture to escape. The entire thing packs up to the size of a soda can.
Pro tip: The S.O.L. Escape Lite Bivvy can be used in as a slipcover for a sleeping bag. The bivvy helps insulate the sleeping bag and protect it from the elements.
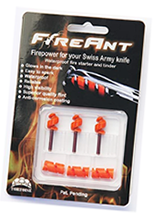
FireAnt Fire Starter and Tinder System for Swiss Army Knives
The smallest ferro rod and tinder combination I know of! Both items screw into the corkscrew on a Swiss Army Knife. The little orange rod and tinder are 100% waterproof so they should work when your back is against the wall. On a more day-to-day level, the FireAnt glows in the dark to help you find your knife at night. These come in packs with three or six pairs of rod and tinder. This gift pairs well with the Victorinox RangerGrip knife shown above.
Pro tip: you can also get a pack of just the FireAnt replacement tinder to replace the ones you’ve used.

Spartan Fire Multi-Use EDC Tinder
You have to love small, multipurpose items when you are in the wild. These flat, waxy strips fit that bill! Not only are they excellent waterproof fire tinder, but they can also be used to lubricate and protect gear. These fit easily in a wallet or in the Wazoo Cap mentioned above.
Pro tip: Spartan Fire Tinder can be heated up and used as an emergency repair patch on a tent.
Hopefully, you found some useful ideas in this list. If you have questions, drop me a line using the Contact page. If you found this useful, consider signing up for my email newsletter using the form at the bottom of the page. Thanks for stopping by!